安装 Asterisk 服务器
依存关系
安装Asterisk之前, 您需要安装以下依存关系 :
- wget
- gcc
- g++
- ncurses-devel
- libxml2-devel
- sqlite-devel
- libsrtp-devel
- libuuid-devel
- openssl-devel
- pkg-config
如需安装libsrtp, 请遵循下面步骤:
cd /usr/local/src/
wget http://srtp.sourceforge.net/srtp-1.4.2.tgz
tar zxvf srtp-1.4.2.tgz
cd /usr/local/src/srtp
./configure CFLAGS=-fPIC --prefix=/usr/local/lib
make && make install
你也需要安装PJSIP, 你可以从如下 [UNKNOWN NODE problematic]。一旦资源目录被提取。
- Change to the pjproject source directory:
# cd pjproject
- run:
# ./configure --prefix=/usr --enable-shared --disable-sound --disable-resample --disable-video --disable-opencore-amr CFLAGS='-O2 -DNDEBUG'
- Build and install pjproject:
# make dep
# make
# make install
- Update shared library links:
# ldconfig
- Verify that pjproject is installed:
# ldconfig -p | grep pj
- The result should be:
libpjsua.so (libc6,x86-64) => /usr/lib/libpjsua.so
libpjsip.so (libc6,x86-64) => /usr/lib/libpjsip.so
libpjsip-ua.so (libc6,x86-64) => /usr/lib/libpjsip-ua.so
libpjsip-simple.so (libc6,x86-64) => /usr/lib/libpjsip-simple.so
libpjnath.so (libc6,x86-64) => /usr/lib/libpjnath.so
libpjmedia.so (libc6,x86-64) => /usr/lib/libpjmedia.so
libpjmedia-videodev.so (libc6,x86-64) => /usr/lib/libpjmedia-videodev.so
libpjmedia-codec.so (libc6,x86-64) => /usr/lib/libpjmedia-codec.so
libpjmedia-audiodev.so (libc6,x86-64) => /usr/lib/libpjmedia-audiodev.so
libpjlib-util.so (libc6,x86-64) => /usr/lib/libpjlib-util.so
libpj.so (libc6,x86-64) => /usr/lib/libpj.so
Asterisk
- 为了安装Asterisk的13.7.0, 你可以直接从下面链接 下载资源。
- 导出Asterisk
tar zxvf asterisk*
- 输入Asterisk 目录
cd ./asterisk*
- 运行Asterisk 配置脚本
./configure --with-pjproject --with-ssl --with-srtp
- 运行Asterisk 菜单选择工具
make menuselect
- 在菜单选择中,转到资源选项,并确保启用了res_srtp。 如果res_srtp旁边有3 x,则srtp库存在问题,您必须重新安装它。 保存配置(按 x)。 您还应该在res_pjsip行前面看到星号。
- 编译和安装Asterisk :
make && make install
- 如果您需要样本配置,则可以运行“制作样本”来安装样本配置。 如果您需要安装Asterisk启动脚本,则可以运行“ 进行配置”。
DTLS 认证
- 然后你要安装DTLS认证
mkdir /etc/asterisk/keys
- 进入Asterisk脚本目录 :
cd /asterisk*/contrib/scripts
- 创建DTLS证书(用您的IP地址或DNS名称替换pbx.mycompany.com,用您的公司名称替换My Super Company):
./ast_tls_cert -C pbx.mycompany.com -O "My Super Company" -d /etc/asterisk/keys
配置Asterisk服务器
对于WebRTC,许多必需的设置必须位于对等设置中。 全局设置不会很好地流入对等设置。 默认情况下,Asterisk配置文件位于/etc/asterisk/ 中。 首先编辑 http.conf,并确保未注释以下行:
;http.conf
[general]
enabled=yes
bindaddr=127.0.0.1 ; Replace this with your IP address
bindport=8088 ; Replace this with the port you want to listen on
接下来,编辑sip.conf。 WebRTC对等方需要启用加密,avpf和icesupport。 在大多数情况下,应该禁用directmedia。 同样在WebRTC客户端下,传输需要列为 ‘ws’ 以允许进行websocket连接。 所有这些配置行都应位于对等方自身之下; 全局设置这些配置行可能不起作用:
;sip.conf
[general]
realm=127.0.0.1 ; Replace this with your IP address
udpbindaddr=127.0.0.1 ; Replace this with your IP address
transport=udp

[1060] ; This will be WebRTC client
type=friend
username=1060 ; The Auth user for SIP.js
host=dynamic ; Allows any host to register
secret=password ; The SIP Password for SIP.js
encryption=yes ; Tell Asterisk to use encryption for this peer
avpf=yes ; Tell Asterisk to use AVPF for this peer
icesupport=yes ; Tell Asterisk to use ICE for this peer
context=default ; Tell Asterisk which context to use when this peer is dialing
directmedia=no ; Asterisk will relay media for this peer
transport=udp,ws ; Asterisk will allow this peer to register on UDP or WebSockets
force_avp=yes ; Force Asterisk to use avp. Introduced in Asterisk 11.11
dtlsenable=yes ; Tell Asterisk to enable DTLS for this peer
dtlsverify=no ; Tell Asterisk to not verify your DTLS certs
dtlscertfile=/etc/asterisk/keys/asterisk.pem ; Tell Asterisk where your DTLS cert file is
dtlsprivatekey=/etc/asterisk/keys/asterisk.pem ; Tell Asterisk where your DTLS private key is
dtlssetup=actpass ; Tell Asterisk to use actpass SDP parameter when setting up DTLS
在sip.conf和rtp.conf文件, 您还需要添加或取消注释行 :
icesupport = true
stunaddr = stun.l.google.com:19302
最后, 建立extensions.conf文件 :
;extensions.conf
[default]
exten => 1060,1,Dial(SIP/1060) ; Dialing 1060 will call the SIP client registered to 1060
配置Odoo VOIP
在Odoo, 配置应该在用户的偏好来实现。
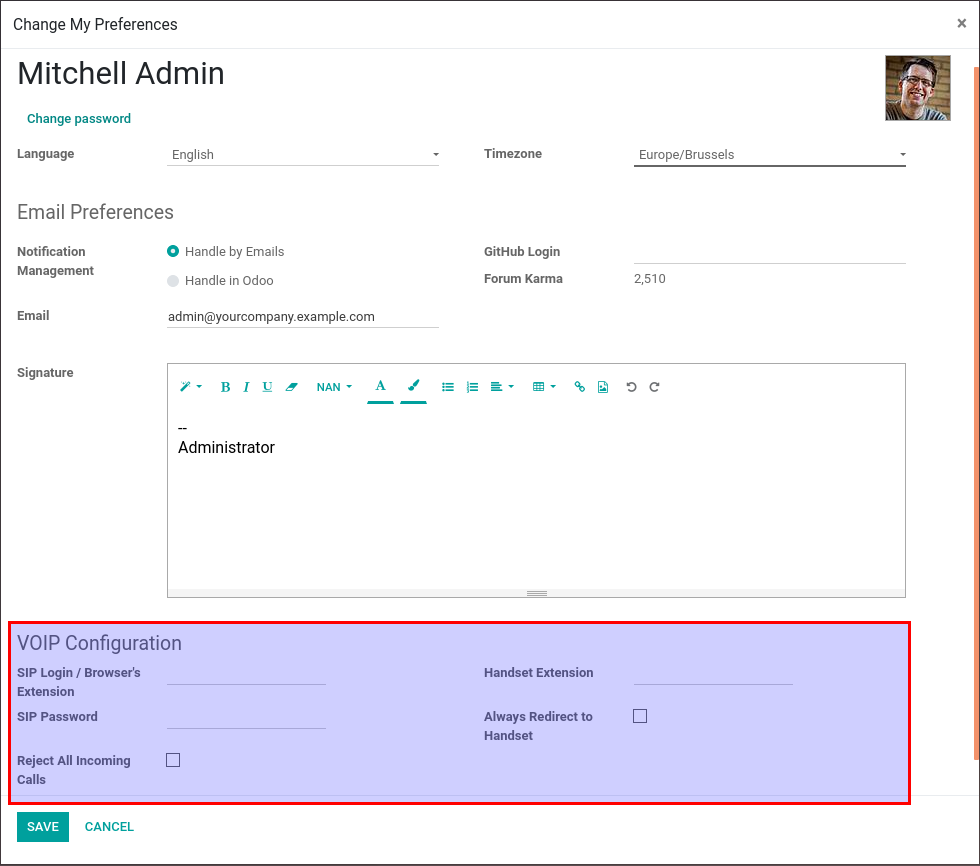
- SIP登录/浏览器扩展是你以前在sip.conf文件中配置的数字(在我们的示例中:1060)。
- SIP密码是你在sip.conf文件中选择的密码。
- 你的办公室电话分机不是必填字段,但如果你想将电话从Odoo转移到sip.conf文件中配置的外部电话,则需要填写。
你也可在一般设置的“集成”部分完成本配置。
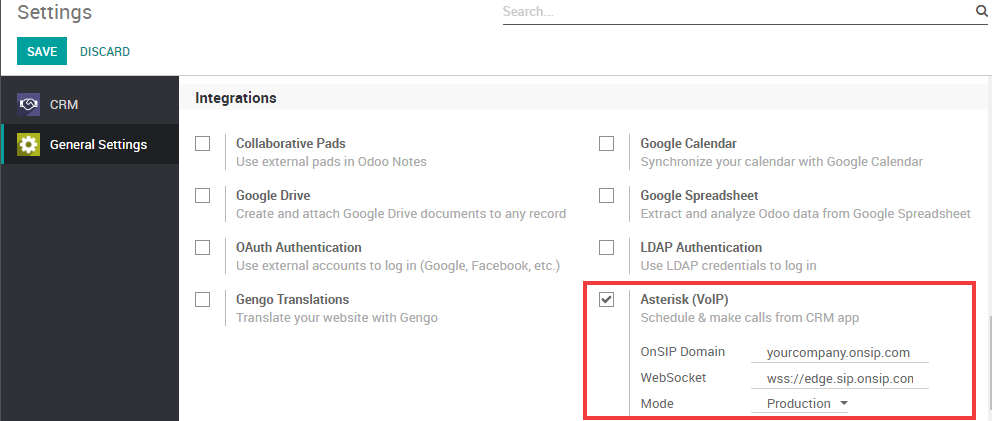
- PBX服务器IP应与你在 http.conf 文件中定义的IP相同。
- WebSocket应为: ws://localhost:XXXX/ws ,其中“localhost”应与之前定义的IP相同,且“XXXX” 应为http.conf文件中定义的端口。